 Done at last! Vacuuming and dusting await, although I have manged to keep up with dishes (thanks to Alex) and meals other than TV dinners. I'm going to call the game: success with hints of panic.
 Our version of "Opposites Attract" by Cheryl Armstrong as seen in Fabric Trends for Quilters, Summer 2009, pgs. 74-78. The two outer borders are our addition.
There is only 1/2 yard of red in this quilt. Not enough of the provided white fabrics to make more log cabin blocks, hence the quadruple border to get it up to Mary's required size.
Is there such a thing as a border calculator? I could sure use one! The 2nd check border was Alex's recommendation, and a good one. But then I ran out of fabric on the 3rd black border, requiring the dot corner sets.
Here are some hints for adding big borders:
- Start with a tail. Don't match corners at the beginning of piecing. The tail gives you a "runway" so your border gets a clean start and isn't dragged into the throat plate by it's own weight.
- Raise the presser foot (needle down, of course) every time you stop to finger pin. I find that these little tension breaks keep my borders from stretching, curling and frustrating.
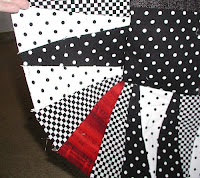
How do you like the round corner pieced border? It was SEW Easy! I will show you in tomorrow's post how it works. Do you think is was wrong to put round corners on a log cabin quilt? After all, log cabins are very square blocks. But this was not a traditional setting, so I went for it. Anyway, Pearl approves.


No comments:
Post a Comment
Thanks for reading! I will reply ASAP :) --KP